LONG POST. Previous talk about first computers inspired me to track down my first. A Commodore Pet with a whopping 8K of memory.
I found this non-functional unit that looked in great condition all things considering:
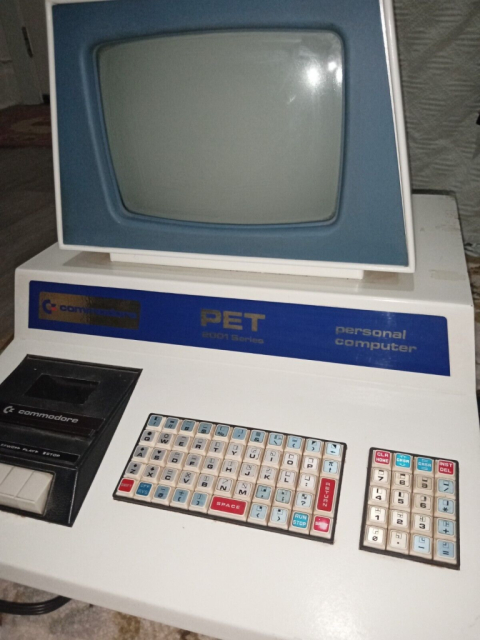
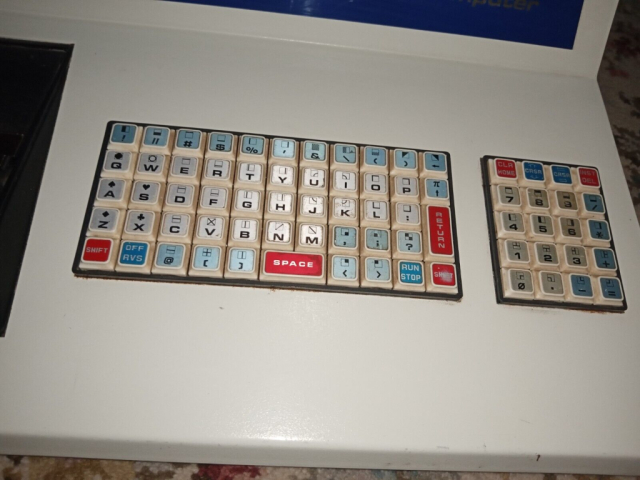
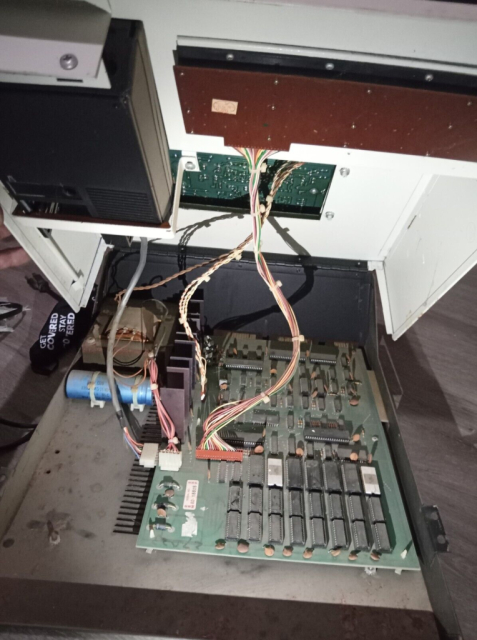 Yeah that dust has been on the motherboard and components so long it is chemically bonded. Blowing off with an air-compressor has no effect.
I then ordered this modern MB, hoping I could get the CRT, keyboard, and dataset to operate.
https://www.thefuturewas8bit.com/shop/commodore/minipet4080d.htmlI removed the back cover to the CRT and it is no surprise that it look bad too:
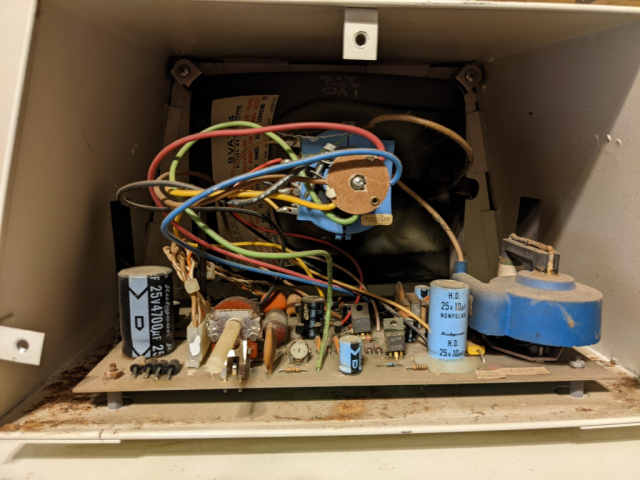
The next step was disassembling the removing the CRT with motherboard since they are soldered together and cleaning with 91% isopropyl alchohol. I don't have a picture of it after cleaning right now, but it does look better, although still rough due dust baked with heat.
I cleaned up the power supply + large capacitor and unplugged it from everything so I could test the voltages. I did not expect them to be good, but they were with spec!
Once I received the motherboard, with some worry, I plugged it in to the power supply from the pet and turned it on. I heard signs of life from speaker and turned it back off.
I then plugged the ancient monitor into the MB and with appropriate dip settings. It came up!!! Some wobble, but I've read the message boards and they are guessing power supply. It could also be the wires, the solder joints look frayed, at least connecting to the monitor tube.
I also plugged in the keyboard, just to see if it would work but I'd say about 30% of the keys are working. At least I know it isn't dead...
I disassembled the tape player (built in), and the belt is shot. Other than that it looks clean and ready to go. Before I try it I'll be sure to clean the heads...
I ordered a new belt for the tape player.
Day 1 of work CompleteI was worried everything would be dead in this computer, but it's coming back to life, amazing stuff.
Working on the monitor wobble, I messed with the trim settings (inside the monitor, on the tube!), by just fiddling with them left and right. I turned it back on, still wobble.
I then adjusted the vertical trim pot by first tightening/loosening to free corrosion inside. Voila! Rock solid stable.
I figured the pots and trim could have corrosion causing issues - my hunch was right!
I then disassembled the keyboard and cleaned each key (PAINFUL & HOURS & HOURS!). There was such much crap in the ancient keyboard too.
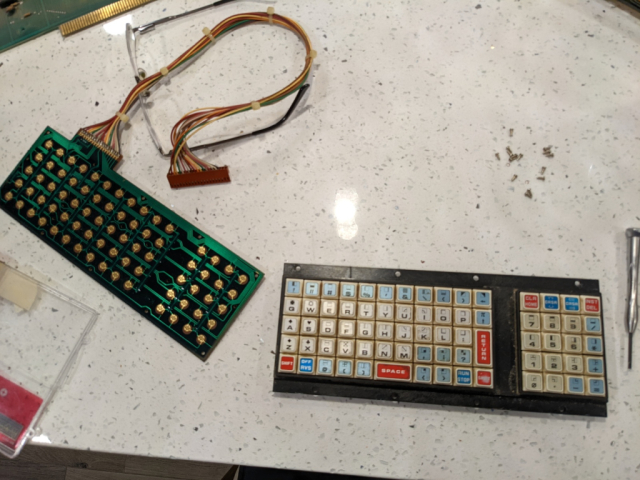 Removed circuitboard from keys, but have not disassembled keys.
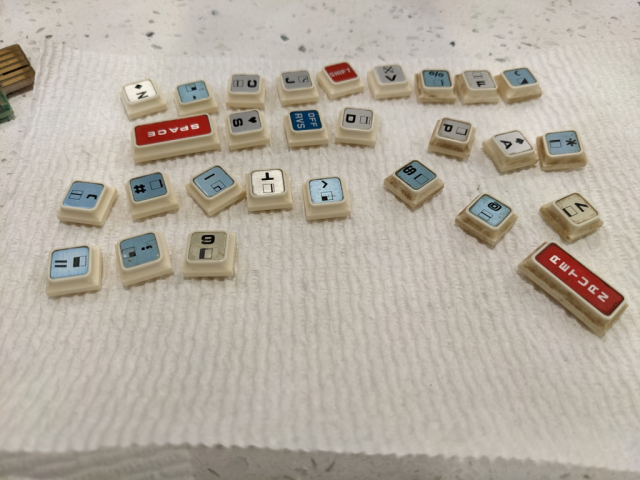 Unfortunately, I did not take pictures of the tons of pieces for each key, but I did take a picture of before (right) and after (left) of the cleaning of each key
I put it back together, and about 60% of the keys are working. It took over an hour to re-assemble all the parts...
From reading, I knew it would likely have issues but cleaning is the first step.. I read that the conductive nature of material mix in the rubber through the years does not provide enough to complete the circuit. So I just used some electrician's conductive paint to paint the portion of the rubble that completes the circuit when the key is down. I'm waiting for that to dry now.... I did NOT have to disassemble the whole keyboard to do this, just the PCB from the back of the keyboard so I could access the underside of the keys (thank goodness).
In the meantime, I finished isopropyl alcoholing the main motherboard, with toothbrush qtips and cotton balls. It looks great.
Later on day 2...
Getting the keyboard to work was PAIN FROM HELL. Evidently the conducting paint I am using likes to just flake off, so it is a temporary solution but it seems to be holding in there for now. I need to order a carbon based conducting paint. Evidently for this purpose that is the "good stuff".
The good news is, I know exactly where the problem is with the keyboard and exactly how to make a permanent solution once mine starts failing.
I'm now finally able to load programs and stuff on it (because the keyboard fully works!)
I'm so happy this thing is working. Of course I had to find an old copy of the game that inspired me to learn how to program. The new MB has an SD card interface where you can copy programs!
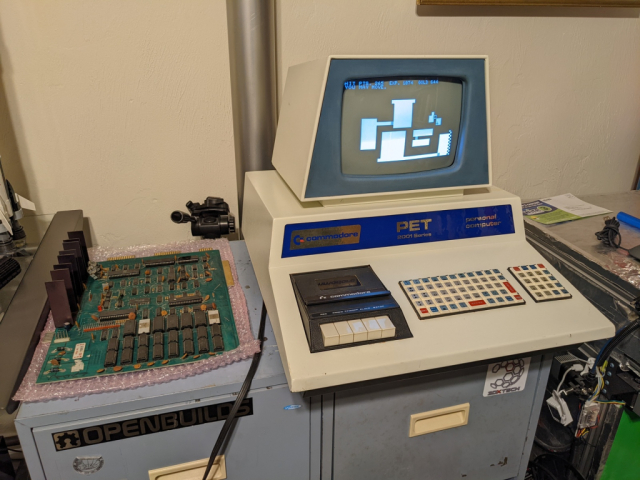 The motherboard in this shot is cleaned, but not tested - I did not want to take this job on yet. The computer is all cleaned up, using the newer motherboard with the game running. This is the game that inspired me to learn to program. The screen looks perfect, but the photo captured the refresh rate
 Day 2:
Monitor DONE!
Keyboard Operational
MB just cleaned - untested.
Tape Player: Ordered belt. I can't test until it comes in. Of course that means I need a tape cassette too! OMG
At this point, my weekend was over, I'm burned out (plus I have to go to work tomorrow), so I hold off on trying the old original motherboard. Evidently this version is an early production version (note bluish tint around monitor). It has ceramic rom chips rather than plastic - a sure fire give away that it is an early model. The first production was the 2001-4 (4K) - this is 2001-8 so it was built in likely early 1978.
When we had one (I believe dad purchased in 79), it had a black border around the monitor, so it was a later production run.
During the week (after work) tape drive:I receive the belt for the tape drive!
I cleaned the cassette tape player, oiled it, greased it, cleaned the heads with alcohol.
Assembled it, and evidently I got oil on the rubber grips, so everything was slipping.
Disassembled, cleaned grips thoroughly with alcohol, reassembled.
Load a game off SD card (new motherboard - pretends it is a diskette!)
Save game to cassette (old motherboard has no choice, so I figure get it ready).
Load game, it works!
Put the cassette back in the computer, mount, etc.
Works intermittent!
Disassemble, clean all the metal internal switch leads (contacts) when you press play, etc.
Works intermittently.
WTH?
Listen to the cassette that I saved a game on and the recording is cutting in and out - yes, I had to order a "normal" cassette player to do this.
Look at the contacts to the motherboard.
Evidently at some point I had broken two of the contacts inside the plug when I inserted it to the motherboard connector!!! GAH! I now know what to look out for - and how to properly insert.
Ordered replacement metal contacts.
Later during the week MB:I read quite a bit of material online most people were able to get at least something working if they thoroughly cleaned the motherboard. Guides had steps to check.
I also read that while the power circuitry may be less stable due to the capacitors and regulator being old (power circuitry), it rarely (if ever) dies shorting over overvolting.
The key being that I cleaned the motherboard - without doing that, you could blow all kinds of components.
Anyhow, I decided to wing and and plug it in.
I powered it up and the screen came up and told me it had 5119 bytes free (it should read 7167 bytes free). Half the screen was garbage characters, but it was ALIVE!!!
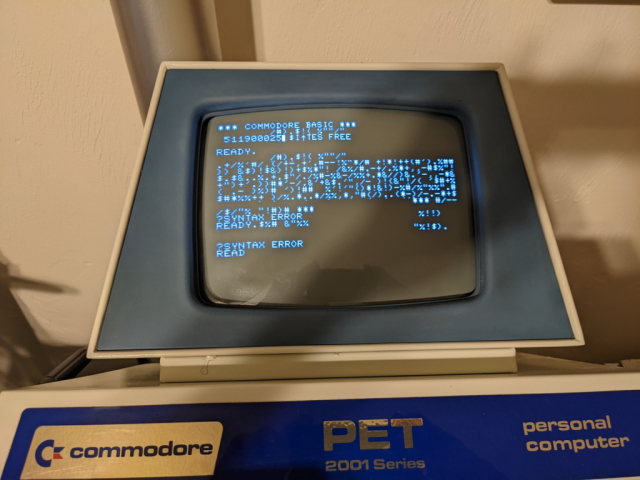 Garbage characters on screen
The online guides told me that the garbage characters was a bad video memory chip. I unseated the two memory chips to video, cleaned the contacts thoroughly (eraser) and plugged them back in and turned on.
5119 bytes free, no more garbage characters.
The way memory works on the pet is it is in pairs. Each memory chip was manufactured at that time by their own plant! Once it detects bad or "no" memory, it stops checking. So this told me of the 8 banks (two chips in each bank), that one or both the chips were bad in bank 7. Bank 8 is unknown because it never got that far.
I took out the chips and swapped them for the chips in bank 8 (cleaning all the contacts on the 4 chips with an eraser)
Plugged the two from bank 8 in bank 7. Turned it on, 6143 bytes free! So the two unplugged chips, likely one or both were bad.
I swapped one of the chips in bank 7 with one of the possible failed chips. It still came up with 6143 bytes free.
I then swapped the second chip and it went back down to 5119 bytes free. I tried really cleaning that last chip and inspecting it. Unfortunately, nothing looks physically wrong with the outside.
Only one bad chip on the whole thing, I couldn't be happier!
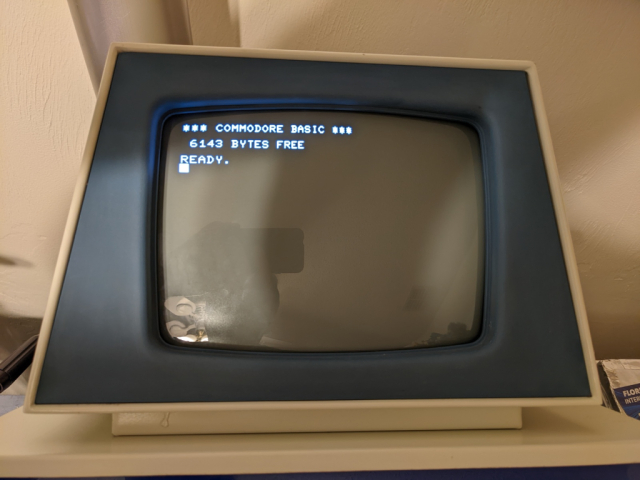 Memory will stay at 6143 bytes free until new chips come in.
There could be some bad ROMS, I have to run a test program to check once I get the tape cassette working to see, but the bottom line is almost everything on this computer is operational.
Cool as a moose!
So... The cassette player worked, but having to unplug it and plug it in so many times took its tole on the metal contacts - I really didn't think about the age of the contacts and I should have.
I am guessing this is the source of intermittents - hopefully when they broke they didn't short anything too long when plugged in - I'd hate if I blew a component!
I've ordered heatsinks for all the custom non-produced memory chips - I'm still zeroing in on finding the old memory chips (I'll get 4 so I have backups)
I've also ordered heatsinks for the ROMs because they were also custom built and there is no alternative other than a MOD to a newer rom.
By reducing heat, it could possibly expand the life of these hard to get components.
I measured the voltages outputted on the motherboard power circuitry and made sure they look good. I could also check with a scope, but I don't own one, nor do I know how to use one (although I always saw our electronics engineer using one). 5.12v, 5.11v, 5.09v, 5.11v (farthestback) - well within range.
Day 7After repairing the connectors, I come to the realization that I am now in tape cassette (dataset) hell similar to this guy's video:
https://www.youtube.com/watch?v=rB_Cshd9mTgOriginally, I was able to write to the cassette (intermittently), but read back no problem.
Unlike his, mine can only read, but can not write (anymore). It does erase, so the erase mechanism (different head) is working.
I checked all the mechanical -- where he had the problem, and mine is fine.
At this point I think the only thing I can try is replacing caps as they do go bad after time.
Later that day...
I left this alone all day, thinking I'd just wait until I ordered some capacitors so I could replace before resuming.
I then had an idea that I didn't expect to do much...
IT FIXED IT!!!
So there is this large metal housed long switch tied to the record button. It has an internal spring and it must connect about 9-10 separate contacts when you press record.
Originally when I was testing, I was having intermittence with recording so when I took it apart, I listened to the switch when I pressed it. It sounded gritty and nasty inside. With it having an internal spring and grit, I squirted some WD40 in it and worked the mechanism to both get the grit out and lubricate the spring. It was silent! I didn't think more about it as I have also done that to regular connectors with no problem. I re-assembled it an moved on.
Well, tonight I thought about the oil acting as an insulator on the little metal contacts in that housing. I took it outside and poured alcohol through it and worked the mechanism, poured more alcohol and worked it some more.
Without re-assembling, I put the tape on top and tried to record. I then put it in the analog tape player to listen assuming I would hear a blank usual recording. I heard the tones like a modem connecting - woohoo!
Testing with small programs 100% success. Midsize programs work pretty well and load about 70% of the time with the tapes I have.
With larger programs like a chess game, it fails to load, giving me a load error - but I blame my crappy low quality cassettes I purchased rather than the tape player - the tape player appears to work perfect. I listened to the audio on the long programs and it is clean sounding with no intermittence in the recording, which is what leads me to believe it is the cassettes themselves - I remember this from when I was a boy.
It could be misaligned head like what the guy in the video is testing, but I don't think so, the recordings when played back on the regular tape player sound spot on. (Read and Write occur on the same head)
I contacted the Luke at
https://console5.com since he knows much more about capacitors (electrolytic are the most problematic as they fail with age) and has kits as well as an excellent guide
https://console5.com/wiki/Installing_Capacitor_Kits He doesn't have a kit for the 2001-8 (6550 early RAM version), but seems excited to work with me. Today I sent him many pictures of the MB, monitor, and cassette circuitry as well as the cap numbers I can identify.
On to the next things:
- Ordered quality 30 minute tapes.
- Getting new capacitors and replacing all of them on the MB, tape drive, and monitor.
- Once my assorted heatsinks come in the mail, I'll glue those to the no longer manufactured parts to extend their life.
As recommended by the guides - I currently am using an auxiliary power supply so I don't engage the old monitor (hardwired to PS) as turning it on and off is hard on it. I also have the new motherboard plugged into the old keyboard and tape drive so I stress a minimum amount of components before I replace the caps and add the heatsinks. The new MB has a composite video output option so I have it plugged into a LCD monitor for now. The new MB was definitely worth the $ for diagnostics, that's for sure - especially since it has a built in SD chip slot that I can save files to from my computer and it acts as a disk drive. That's how I'm getting these programs to cassette in the first place.
For now on, I'll post as I go. Everything is currently operating on the computer - although I need to test with the HQ tape cassettes once they arrive.